Kulinarya - Suman

Thanks to Sheryl from Crispy Waffle and Divina from Sense & Serendipity the theme for October’s Kulinarya Cooking Club is Suman. This was a really challenging dessert for me to make. I remember watching my grandmother making it but never thought that I would one day make it myself.


I rang my Aunty Dulce and asked her to help me with this months challenge. We decided to make Suman sa Lihiya. So with my Grandmothers recipe in hand, we started the long process of making this delicious dessert.

Suman Sa Lihiya with Latik

1 kilo of Glutinous Rice
1 teaspoon of Lye Water
1 kilo of Banana Leaves
1 roll o kitchen twine

(You can find the Lye Water and the Banana Leaves at any Filipino Food Store)

The first thing that needs to be done is to prepare the banana leaves. Take the leaves and cut them into approximately 30cmx 30cm pieces. Wash the banana leaves and allow them to drain. Make sure they are still slightly damp. Turn on the stove top and pass the leaves on both sides. They will change colour from a light green to a dark green. This is done so that the leaves are more pliable. It ensures that you can wrap the suman mixture without the leaves falling apart.

1. Wash the glutinous rice a few times to get rid of the grit. Put the rice in a large bowl and add the lye water. Mix well.

2. Take one big spoon of the rice mixture and put it in the middle of the banana leaf. Take both ends of the leaf and bring it up. Fold both ends down and tuck the sides to form a small parcel.


3. Take 2 of the small parcels and put them on top of each other. Get some kitchen twine and wrap it around and tie a small knot on the side to secure.


4. Once all the suman is wrapped, put it all in a deep pot and cover with water. Boil the suman for two hours. After 2 hours take the suman off the heat and drain.

5. Set aside while you make the latik.


Latik Sauce

2 cans of coconut cream
1 to 1½ cups of brown sugar firmly packed

1. In a medium saucepan, combine the sugar and the coconut cream together.
2. Stir over medium heat until the sugar is dissolved. Let the mixture reduce until it is a thick consistency. Make sure to stir the mixture constantly to avoid sticking to the bottom of the saucepan.

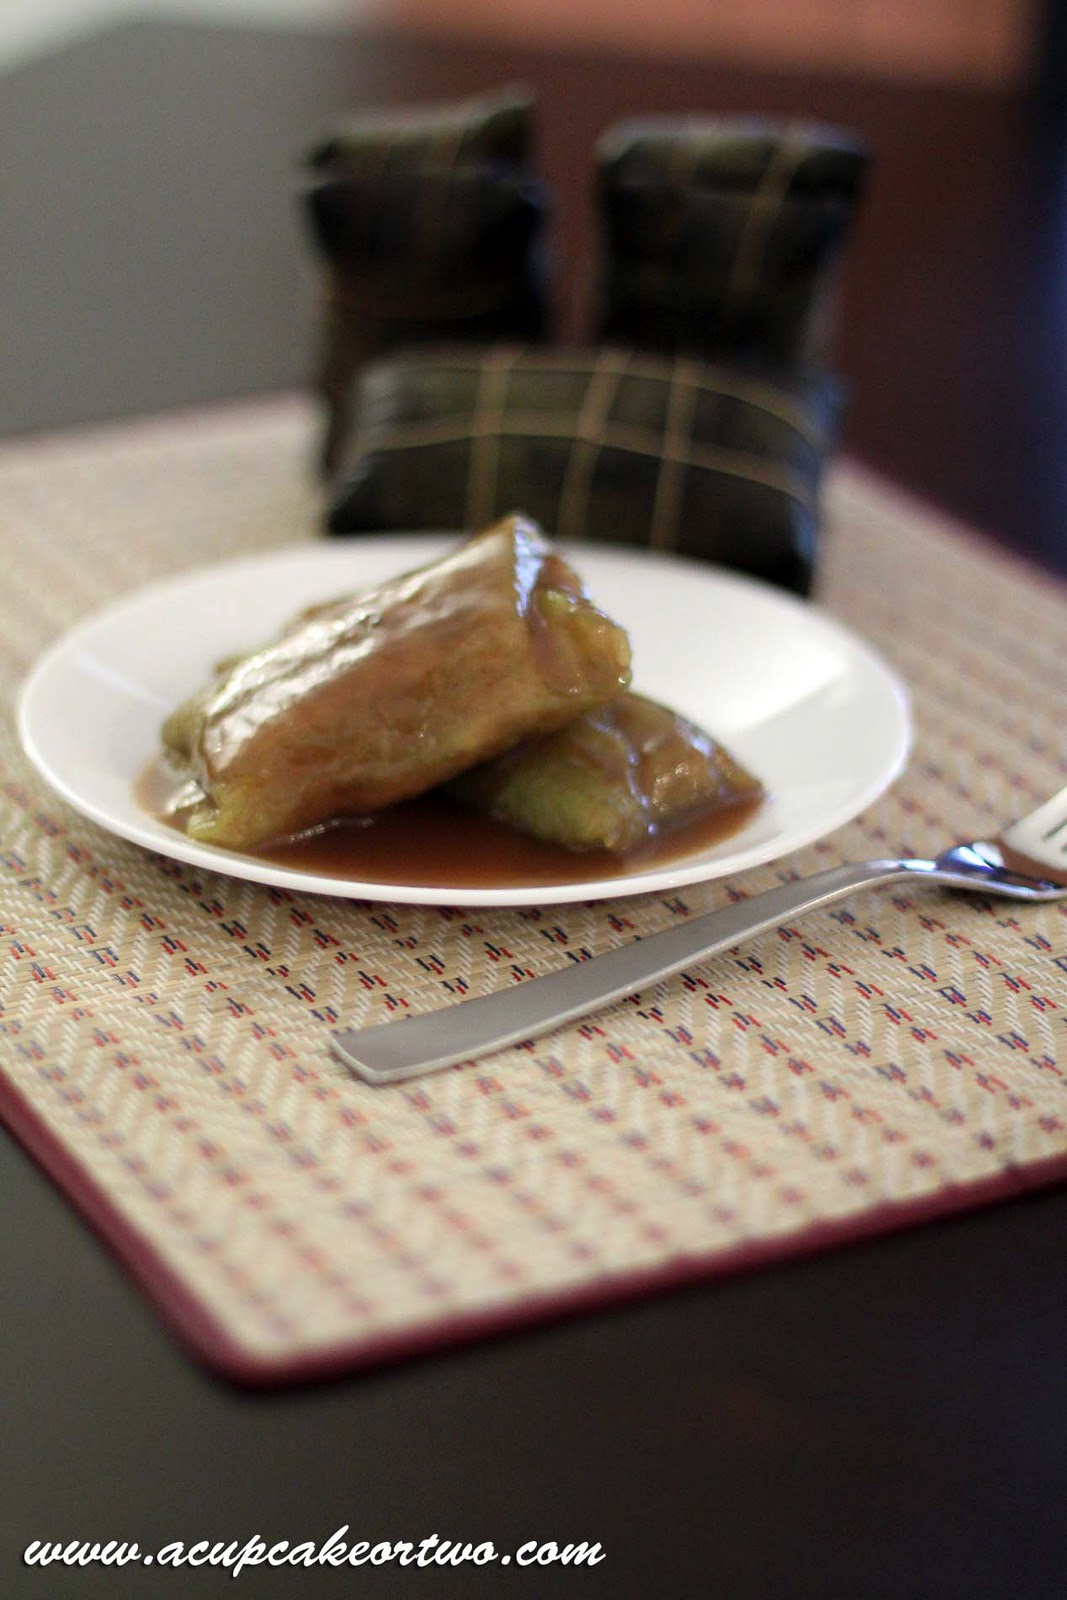
To serve – Peel the banana leaves of 2 suman and serve with lots of latik on top.


Kulinarya Cooking Club was started by a group of Filipino foodies living in Sydney, who are passionate about the Filipino culture and its colourful cuisine.
Each month we will showcase a new dish along with their family recipes. By sharing these recipes, we hope you find the same passion and love for Filipino Food as we do.
If you’re interested in joining our Kulinarya Cooking Club, please feel free to drop by our foodblogs and leave a comment – we would love to hear from you!


Say hello to the other members of the Kulinarya Cooking Club!

Tressa
Connie Veneracion frm http://homecookingrocks.com/
Rochelle Ryan from http://www.whydiss.blogspot.com/

And of course… Trish from Sugarlace and Trissa of Trissalicious!


Read more...

Rice Cube

Kitchen gadgets are great. They make cooking and baking more fun. I first saw the Rice Cube at a tradeshow in Melbourne. Ross who is the brains behind the Rice Cube, invented it to help him present his signature dishes.

I watched Ross demonstrate and I instantly wanted my own. At first glance it looks like 2 pieces from my nephews Lego collection, but once you see how it works, it’s incredible.


I decided to make some California Maki and instead of rolling it with the nori, I used the Rice Cube and made 4 different versions. I found it so easy to use. Its a great little gadget and I would recommend it to anyone that wants to improve their presentation skills.


For more information about the Rice Cube, you can go to http://ricecube.net It retails for $34.95. It's the perfect gift for any foodie.


Below is a video of how to use this cool little gadget.

Read more...

Kulinarya - Spanish/Filipino Dishes and Desserts

Thanks to AC from Acdee and Ziggy from My Filipino Kitchen, this months Kulinarya theme is Filipino/Spanish dishes or desserts.  

I decided to make Pastillas De Leche.  This is normally made with Water Buffalo milk and cooked until the mixture is thick. It is then cooled and rolled in sugar.  I couldn’t find any Water Buffalo milk, so I decided to use a recipe that my mum often makes for her friends. It’s simple and doesn’t require any cooking.


Pastilles De Leche

Ingredients
2 cups of powdered milk
1 can of condensed milk
1 tablespoon of melted unsalted butter (optional)
½ cup of caster sugar


Method

1. Sift the powdered milk into a bowl.
2. Combine the melted butter and the condensed milk into another bowl.
3. Add the sifted powdered milk into the condensed milk mixture and stir until well combined. It should be a thick and sticky consistency.
4. Grab spoonfuls of the mixture and roll into small cylinders. Coat in the caster sugar and wrap individual cylinders in tissue paper or cellophane.


This Spanish/Filipino inspired sweet is sure to please. It's a breeze to make and incredibly delicious.


Kulinarya Cooking Club was started by a group of Filipino foodies living in Sydney, who are passionate about the Filipino culture and its colourful cuisine.
Each month we will showcase a new dish along with their family recipes. By sharing these recipes, we hope you find the same passion and love for Filipino Food as we do.
If you’re interested in joining our Kulinarya Cooking Club, please feel free to drop by our foodblogs and leave a comment – we would love to hear from you!


Say hello to the other members of the Kulinarya Cooking Club!
Tressa

And of course… Trish from Sugarlace and Trissa of Trissalicious!

Read more...

Fenix - Richmond Victoria

On a recent trip to Melbourne, I had the pleasure of dining at Fenix.  Fenix is MasterChef judge Gary Mehigan’s restaurant, which re opened it’s doors in July this year. The restaurant was everything I imagined it to be, comfortable, homely and relaxed.


We decided to start of by ordering some delicious cocktails. I ordered the Silk Harmony, which was a Lychee cocktail, combined with Cuban rum and lime juice.  This was served in an extra tall glass with plump lychees on top. So incredibly refreshing.


Cathrine ordered the Parched as Bro. As soon as I saw this on the menu I asked her to order it. What a classic name for a deliciously fruity cocktail. The name still makes me laugh.


For the entrée, I ordered the seared Tasmanian Scallops with Pickled Cauliflower, Tahini Yoghurt and Israeli Cous Cous $9.50. This was beautifully presented and the scallops were cooked perfectly. The Israeli cous cous added a bit of texture to this dish.


Cathrine had the Piperade Basquaise $9.50. This was a large serving for an entrée accompanied by some delicious sour dough bread. It was sweet and full of flavour.


Braised Pork Belly, Crisp Crackling, Pickled Cabbage, Ragout of Pork Cheeks, Potato and Baby Carrot $38.00, was my choice for the main. Succulent pork belly with a perfectly crispy crackling, not to mention the pork cheek, which was so soft with the creamy sauce.


36 Hour Braised Lamb Shoulder, Sweet & Sour Shallots & Parsnip Puree $39.00. I was tossing up between the pork belly and the lamb for the main. I was so glad Cathrine was kind enough to let me taste this.  The lamb shoulder was so soft and silky and the parsnip puree was smooth.


Roasted Artichoke & Kipflers Garlic and Rosemary $9.00. This was actually the first time I have tasted Jerusalem Artichokes. The artichokes along with the kipfler potatoes were roasted to perfection with a touch of sea salt and rosemary.


When I dine out, I always make sure to leave room for dessert. We ordered the Chocolate Soup with Hazelnut Praline & Mascarpone Sorbet $17.00 and the “This is It” Lemon Tart $15.00. When the chocolate soup came out, the smell was so intense. It was rich and velvety with the crunch of hazelnut praline and light mascarpone ice cream.


The lemon tart was light, with a delicious pastry and tart filling. It looked like a small slice but it was very filling. This is certainly a dessert that I will try to replicate at our next big family gathering.

Fenix has a relaxed feel with a comforting menu. The staff are friendly and the view is fantastic. I will definitely be coming back on my next trip to Melbourne.

680-682 Victoria Street
Richmond Victoria 3121

For Bookings call 03 9427 8500

Read more...

Chocolate Macarons, a recipe from Trissalicious

Wow how time flies. I can't believe we are already in August. A few weeks ago I had the opportunity of learning all about the secrets to making the perfect macaron. Trissa from Trissalicious was kind enough to have a few of us over for a practice run at a macaron class that she will be doing at Essential Ingredient.


As a passionate baker, making macarons was something I really wanted to Master. Although I don't always make the perfect batch, I certainly learnt a few handy tips and tricks from Trissa.

The recipe below is Trissa's delicious Chocolate Macarons. I added a little bit of texture by adding roughly chopped pistachios to the chocolate ganache.


Chocolate Macarons

125 grams almond meal
125 grams icing sugar (not icing mixture)
30 grams Dutch processed cocoa powder
100 grams caster sugar
100 grams egg whites (from around 3 eggs)

1. In a food processor, grind the almond meal, cocoa and icing sugar for about 5 minutes and set aside

2. Place the egg whites in a clean bowl and beat until soft peaks.

3. 
Add the caster sugar, 50 grams at a time while beating the egg whites.

4. 
Beat the whites until stiff peaks5. Fold the almond meal mixture into the egg whites in three additions until well combined. 

5.Fold the almond meal mixture into the egg whites in three additions until well combined.6. Pipe on to baking trays, lined with baking paper. (I used a Wilton 1A piping tip to pipe the macarons).

6. Pipe on to baking trays, lined with baking paper. (I used a Wilton 1A piping tip to pipe the macarons).

7. Let the macarons dry for about 30 minutes. To check if the macarons are ready to bake, gently press down on the macaron. If no mixture sticks to your fingers, it’s ready for the oven

8. Bake the macaron shells at 150C for around 13 to 15 minutes depending on your oven.


Chocolate Ganache 

200 grams dark chocolate, evenly chopped 
200 grams cream  


1. Microwave the dark chocolate in 20 second intervals until melted.  
2. In a saucepan, bring the cream to a boil on a medium heat.
3. Pour the cream into the chocolate and stir until well combined.
4. Set the ganache aside to cool.


Preparing the Macarons
Sandwich 2 macarons of equal size with about 1 teaspoon of ganache. Make sure to be careful when pressing down.


Trissa has teamed up with Essential Ingredients for a Macaron Making class on the 21st of August (Saturday) from 10:00 am to 1:00 pm.  In this three hour class you will learn the secrets to making the perfect macaron. You will also get to take your delicious treats with you. The class is $125 per head and spaces are filling fast. 
Essential Ingredients is located in 731 Darling Street, Rozelle.  For bookings, please call 9555 8300.

Read more...
Related Posts with Thumbnails