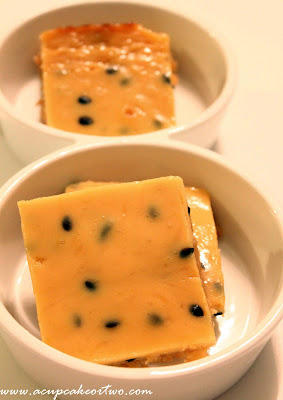
Kulinarya - Leche Flan

This months Kulinarya dish was picked by Trissa. She decided on Leche Flan which is one of the most popular desserts in the Philippines. It is similar to Crème Caramel. It’s melt in your mouth and really easy to make.


I have only made Leche Flan once. It was for our Forensic Dinner and I was nervous about turning it out onto a plate just in case it didn’t set. I was lucky because the first time I made it, it was perfect.

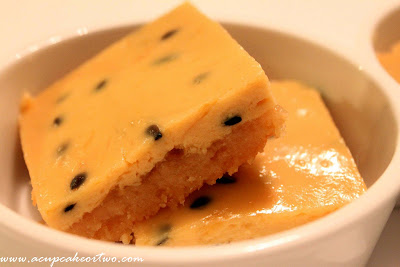
Kulinarya is all about learning how to cook Filipino Food and mastering different techniques of cooking. As you can see, my Leche Flan is not the most attractive. Basically second time around, I wasn’t so lucky. The cream split due to the lime juice. But never fear Beauty is only skin deep. The Leche Flan may look ugly but it sure taste good.


Recipe from my Aunty Dulce

Leche Flan
Ingredients


600ml thickened cream
1 can of condensed milk
12 egg yolks
zest from 2 limes
4 - 5 tablespoons white sugar
juice from half a lime (optional)

Method

1. Preheat the oven to 180C.

2. In a pan melt the sugar until medium brown. Carefully put the melted sugar into a round baking tin.

3. Mix the egg yolks, condensed milk, and cream on a medium speed with an electric mixer.

4. Strain the mixture into another bowl and add the lime zest.

5. Pour mixture on top of the caramel and cover with foil.

6. Put the Leche Flan in a baking tray and pour water until it is halfway up the tin.

7. Bake for 30 to 45 minutes or until set but a little wobbly.

8. Put the Leche Flan in the fridge for at least an hour.


Kulinarya was started by a group of Filipino foodies living in Sydney, who are passionate about the Filipino culture and its colourful cuisine. Each month we will showcase a new dish along with their family recipes. By sharing these recipes, we hope you find the same passion and love for Filipino Food as we do.


If you are interested in joining our Kulinarya Cooking Club, please feel free to drop by our foodblogs and leave a comment – we would love to hear from you!

Read more...

Gruyere Gougeres

One of the things that I adore about my closest friends is their passion for food. When I hang out with the girls, the conversation always ends up with the same subject. We talk about making it, where the best restaurants are, what I’m going to bake next and how good food is in general.

My friend Anna who now lives in Amsterdam sent me an email to issue me a bit of a challenge. She wanted me to make Gougeres. See Anna is as passionate about cooking and baking as I am. The only thing holding her back is the one thing that I don’t think I can live without. An oven… The place that Anna and her fiancé are staying at doesn’t have an oven.


So here you go my friend.. I tried to do my best to take good photos… Enjoy and if I was you Anna. I would knock on the neighbours door and ask them if you can use their oven so you can start cooking again.

Gougeres are French cheese puffs made from choux pastry and a semi hard cheese. It’s extremely delicious. I used Gruyere for this recipe.

This is a David Lebovitz recipe

Gougeres

Ingredients

1/2 cup (125ml) water
3 tablespoons (40g) butter
1/4 teaspoon salt
pinch of chilli powder
1/2 cup (70g) flour
2 large eggs
12 chives, finely-minced
3/4 cup grated cheese


Method

1. Preheat the oven to 220C Line a baking sheet with parchment paper or silicone baking mat.
2. Heat the water, butter, salt, and chili or pepper in a saucepan until the butter is melted.
3. Dump in the flour all at once and stir vigorously until the mixture pulls away from the sides into a smooth ball. Remove from heat and let rest two minutes.
4. Add the eggs, one at a time, stirring quickly to make sure the eggs don't 'cook.' The batter will first appear lumpy, but after a minute or so, it will smooth out.
5. Add about 3/4 of the grated cheese and the chives, and stir until well-mixed.
6. Scrape the mixture into a pastry bag fitted with a wide plain tip and pipe the dough into mounds, evenly-spaced apart, making each about the size of a small cherry tomato.
7. Bake for 10 minutes, then turn the oven down to 190C and bake for an additional 20 to 25 minutes, until they're completely golden brown.


The Gougeres are a perfect snack. If you want to make them a little fancy just serve it with some white sauce with Ham and Chives. Delicious....

Read more...

Fish Friday

Calling out to all SydneySiders. If you are free on Friday the 19th of February, make sure you head down to Martin Place from 12:00pm - 2:00pm to join in for Fish Friday. This is proudly sponsored by Restaurant and Catering Australia and all proceeds go towards Caritas Australia's Project Compassion.


The event will involve some of Australia's top chefs from Aqua Dining, Coast Restaurants, Nicks Seafood and Garfish. They will be preparing some of their signature dishes and you can bid at the silent auction for your favourite.

For more information about Project Compassion and Caritas visit http://www.caritas.org.au/
Hope to see you all there...

Read more...

Passionfruit Slice and My Holiday

Going on holidays is always fun. The excitement builds up when you start to pack and you start to look forward to some time away from reality. I recently went to Hamilton Island with some family for a little bit of a break. I haven’t been on a holiday with family in a really long time. I knew this was going to be different.


My first impression of Hamilton Island was how small it was. The people are nice and it was absolute paradise. The weather was gorgeous, the beach was beautiful and the golf buggy was fun to drive.


I also realised how lucky we are to have such a beautiful country. White haven beach was stunning and not to mention the fish and the coral.


Passionfruit is one of my favourite fruits. Each one is like a surprise. You just don’t know if you will get one that’s sweet or extremely sour. When I saw this recipe, it reminded me of our holiday away. It took me back to those hot summer days by the pool with some of the most important people in my life.


Passionfruit Slice

Base
Ingredients

1 cup self raising flour
1 cup desiccated coconut
½ cup caster sugar
125g butter melted
Topping
Ingredients

1 tin of condensed milk
1 large tin of passionfruit pulp
Method
1. In a bowl combine flour, coconut, sugar and melted butter. Mix this well and press into a tin. Bake at 180C for 15 minutes or until slightly brown.
2. In a separate bowl mix the passionfruit pulp and condensed milk together.
3. Pour the topping over the top of the warm base and put this back into the oven for a further 10 minutes at 100C.

Cool before cutting into squares.


This slice is perfect for a summers day. Its tangy and sweet and 1 slice is not enough.

Read more...

Halloumi Bites with Poached Eggs

I have a fascination with buying eggs. Every time I go to a supermarket I look at the eggs. I never ever get caged eggs, always free range. I check the sizes, I make sure that the eggs are not stuck to their cartons and I even look at the colour. I have a feeling people sometimes look at me and think “Geez this chick has a screw loose”. Come on, everyone has a fascination. Mine just happens to be eggs.

I first came across this recipe for Halloumi Bites on Nigella Lawson’s site a few years ago. It’s so easy to make and perfect with some soft poached eggs


Halloumi Bites

Ingredients

1/4 cup garlic oil
3 tablespoons chopped parsley
2 tablespoons lime juice
Freshly ground pepper
1 packet of halloumi cheese, drained

Method


1. Combine the oil, parsley, lime juice, and pepper (a good grinding) in a large shallow dish.

2. Slice the drained halloumi into ¼-inch wide pieces, and then cut each slice in half again.

3. Heat a dry skillet and dry-fry the slices of cheese until golden on both sides; this should take only a minute or so in a hot pan.

4. Put the fried halloumi into the shallow dish with the rest of the ingredients and make sure each slice is coated.

Serve with softly poached eggs.


The dressing is great with the salty halloumi. I didn’t used parsley because I didn’t have any left, so instead I used some chilli flakes and black sesame seeds for garnish.

Read more...

Yema Balls - A Simple Filipino Treat

Woohooo I’m back.. It’s been a while since I did a post. I was on holidays in sunny North Queensland. I will post some photos up in the next few days.

I wanted to share another Filipino favourite of mine. They are called Yema Balls. Yema is pretty much Dulce De Leche with a twist. Like any other Filipino recipe, everyone has their own version of this.


This version came from my cousin Ping. She is an amazing cook and always gives me great recipes to try. She is full of information about traditional Filipino recipes.


Yema Balls

Ingredients

1 can sweetened condensed milk
4 egg yolks
1 tablespoon of butter
½ cup of nuts - pistachios or roasted peanuts work best (optional)
¾ cup of white sugar
Paper pattie pans


Method


1. In a saucepan on medium heat, melt butter. Add condensed milk and stir for a 1 minute.
2. Add egg yolks and stir. Make sure that you keep an eye on this, otherwise it will burn.
3. Once the egg yolk is incorporated add the nuts. (I didn't use nuts in this recipe)
4. Keep stirring until the yema is thick. Almost like a paste.
5. Take this off the heat and let this cool. Once this is cooled shape into balls and roll in sugar.
6. Serve the yema balls in paper pattie pans.


Tip

Instead of rolling the yema balls in sugar you can dip it in caramel. Combine sugar and water together in a pan and using a thermometre take it up to the hard ball stage. With a tooth pick dip each yema ball into the caramel and put it on wax paper.

Read more...
Related Posts with Thumbnails