Butterscotch Madeleines and a New Hand Mixer

How often do you replace kitchen appliances?? In the Eugenio household, we tend to buy new gadgets but use the old ones until they stop working. A great example is our hand mixer. My mum bought our hand mixer back in 1988. It was one of the first things she bought when we moved into our house.


Thanks to Kitchenware Direct, I had an opportunity to review one of their new products. I chose the Red Kitchenaid Hand Mixer.  It was time for the old mixer to retire and for the new one to make it’s debut. What better way than with these simple Butterscotch Madeleines from Bill Granger’s book Bill’s Basics.


Butterscotch Madeleines

Ingredients

100 grams unsalted butter
2 tablespoons golden syrup
2 eggs
60 grams caster sugar
75 grams plain flour sifted
1 teaspoon baking powder
pinch of salt
icing sugar for dusting


Method

1. Pre-heat the over to 170C. Grease a madeleine tray and dust with flour, shaking of the excess.

2. Melt the butter in a small pan. Remove from the heat, stir in the syrup and leave to cool.

3. Using a hand mixer, whisk the eggs, sugar and a pinch of salt, until pale and fluffy. Add the flour, baking powder and syrup mixture. Fold everything together until well combined.

4. Spoon the mixture into the madeleine tray and bake for 8 to 10 minutes. Cool on a wire rack and dust with icing sugar before serving.


The Madeleines are delicious on it's own or served with lightly whipped cream . They are also a fantastic idea for a homemade Christmas present. The recipe makes close to 20 madeleines.


The Kitchenaid Mixer is a delight to use. It has 7 speeds and the attachments are extremely easy to clean. Although stand mixers are all the rage, this hand mixer is ideal for people who don't have the room for a massive stand mixer. If you are looking for an affordable and attractive looking hand mixer, then the Artisan mixer is perfect.


For the best prices on a range of fantastic Kitchenware Essentials, make sure to check out Kitchenware Direct. They currently have some fantastic offers such as free shipping, cash-backs and bonus gifts with selected items...

Read more...

Japanese Cooking At Kei’s Kitchen

This would be my third class at Kei’s Kitchen. The class we are doing is a Large Platter Class, which Kei and Masako normally do at the end of the year. The dishes you make at this class are normally dishes you would see at big parties.  They are all designed to feed 10 or more people.

On the menu is Ocean Trout Kenchin Style (Stuffed with Tofu), Chicken Rolls with Smoked Salmon, Asparagus with a Tomato and Egg Jelly, Beef Shabu Shabu Salad and two types of Sushi Rolls.

The first thing that Kei teaches the class is how to make the Dashi. She always says at the beginning of every class “No Dashi, No Japanese Food”. After the Dashi is made, we begin by de-boning the 2.5 kilo Ocean Trout which we will later stuff with a Tofu mix.


Kei shows us how to carefully de-bone without damaging too much of the flesh. What took 15 minutes will probably take me an hour to do. She cuts across the back bone without damaging the outer skin and proceeds to take the bones of almost in one piece. One of the students made a comment that its almost as precise as a surgeon.


The fish was later stuffed with a tofu mixture and sewn back together to be baked in the oven. Masako points out that we should always use black thread so its easier to take it off the fish once cooked.


I was assigned to cook the beef for the Shabu Shabu Salad. The meat was thinly sliced Wagyu Beef which I quickly dipped in hot Dashi. This was then served on a bed of salad greens, blueberries, kiwi fruit, radish sprouts, cucumber, oranges and witloof. I have never thought of putting fruit in a salad but it certainly worked and took away from the richness of the thinly sliced meat.


When you think of Japanese food, you don't really think of Chicken Rolls stuffed with Smoked Salmon and Asparagus. I certainly changed my mind after my first bite. The chicken was lean and full of flavour from the smoked salmon and asparagus. The panko crumbs added crunch and even though we fried this dish it was light.


The Chicken Roll was served with a Tomato and Egg Jelly which was made by using Agar Agar. I must admit this was a challenge for me to eat. I found the texture odd but the flavours were amazing.


Each of us had to make a Sushi Roll. We made two Sushi Rolls. A Tuna, Sprout and Wasabi Mayo Roll and a Prawn and Avocado Uramaki. The sushi rice was carefully weighed and we were each shown the proper way of rolling.


After all the preparation, we set the table, ready to eat what we have all made. It was certainly a massive spread, that was beautifully presented. There was so much food that the whole class managed to fill containers with food to take home.


It was a fantastic day, I learnt so much. Kei and Masako have certainly taught me a lot about Japanese Cuisine and I cant wait to go to another class in 2012. 

If you are interested in learning about the art of Japanese Food, make sure you check Kei's Kitchen for their 2012 class schedule.

Read more...

Halloween and The House That Boo Built

Mwahahahahaha… It’s not long till Halloween. I never used to be one to make a big deal of it, until my nephew and niece were old enough to go trick or treating.. It’s so much fun celebrating with the kids. Who knew that carving a pumpkin could be so therapeutic.


“What’s New Cupcake?” is one of my favourite books. It’s by Karen Tack and Alan Richardson. The book is full of fun ways to decorate cupcakes. For Halloween, I decided to make my version of “The House That Boo Built”. 


The House That Boo Built

What you need..

1 black cake stand
2 edible sugar eyes (I got mine from Kitchenware Direct)
3 large pre made chocolate cupcakes iced
3 medium pre made chocolate cupcakes iced
1 chocolate ice cream cone
7 - 8 pieces of pineapple lumps
4 dark chocolate trees made with dark chocolate and orange sprinkles (instructions for trees in Step 1)
candy pumpkins, fake spiders and skulls (optional)


Instructions

Step 1 - Making the Chocolate Trees

Melt 1/2 cup of dark chocolate in a microwave safe bowl for approximately 2 minutes. Put the melted chocolate in a small squeeze bottle. Put some wax paper down on a flat surface and start drawing some trees. There is a pattern in the book that you can use as a guide. Make sure the trees are thick so they do not break when you put them into the cupcakes. Add the orange sprinkles to the trees before they set. Repeat the process until you have made 4 trees. Cool in the fridge for at least an hour before using.


Step 2 - Assembling the Haunted House

- Put 1 large cupcake in the middle of the cake stand, put another large cupcake on top. Get the ice cream cone and carefully place on the top cupcake. Add the edible sugar eyes. Put 2 pineapple lumps on the bottom cupcake. These are the headstones. I was suppose to write RIP on the headstones but my dog Gizmo ran off with the white icing pen that I bought.

- Take another large cupcake and place it in front of the cupcake tower. Add two or 3 more pineapple lumps, some skulls, bones and pumpkin candy. Repeat this with the remaining cupcakes, but place the 4 chocolate trees on the cupcakes too. Put them at the back to make it look like a forest.


This is such a simple way of making Halloween fun. You can use different size cake stands, assorted decorations. It's really up to you. This is also a fun way to get the kids involved. Feel free to be as creative as you want.


Here's to another fabulous goulishly fun Halloween.. Make sure you have plenty of lollies for the Trick or Treaters...... There is nothing worse than being tricked on Halloween.. Mwahahahahahaha..

Read more...

Red Curry Prawn Dumplings

Working in the city, means that I have to travel 45 to 50 minutes each way on the train every single day. My Ipad is pretty much my best buddy on these long trips. One of my favourite Aps is the Martha Stewarts Everyday Food Magazine. The magazine is full of articles, chef bios, handy craft tips and most importantly simple delicious recipes.

These Red Curry Prawn Dumplings are from October’s issue. To make them look pretty I julienned the wonton wrappers instead of wrapping each dumpling. I also steamed them instead of the fry steam method on the recipe.

This dish took me 10 minutes to prepare, 8 minutes to cook and 2 minutes to eat. Not bad eh….


Red Curry Prawn Dumplings
(From Martha Stewart’s Everyday Food Magazine)

Ingredients

400 grams raw green prawns (peeled and deveined)
3 tablespoon grated ginger
2 shallots thinly sliced
4 teaspoons red curry paste
1 teaspoon fish sauce
1 packet wonton wrappers (this recipe makes approx 24 dumplings)


Method

1. In a small frying pan, heat 1 tablespoon of vegetable oil, over medium heat. Fry the ginger and shallots until the shallots are slightly soft.

2. In a food processor, add the peeled prawns, fish sauce and red curry paste. Put the mixture into a bowl and add the cooked shallot and ginger. Stir until combined. Cover with glad wrap and set aside for about 15 minutes to let the flavours combined.

3. Separate the wonton wrappers and julienne small portions at a time, making small strips. Put the wonton strips in a  large deep bowl.

4. Using a melon baller or a measuring spoon, drop small amount of the mixture into the wonton strips. Put each dumpling into a steamer lined with wax paper.

5. Steam the dumplings for 8 to 10 minutes. The dumplings are cooked when they are firm to touch and the wonton strips are translucent.

6. Serve the dumplings with a dipping sauce made with 2 tablespoons of soy sauce, 1 tablespoon of grated ginger and 1 teaspoon of sesame oil.


These dumpling are just delicious. The red curry is a fantastic addition and doesn't take away from the flavour of the prawns. Make sure you add your own flavours to the mixture such as bamboo shoots or water chestnuts for crunch. Frying them would also give you a different texture and flavour.

Read more...

A Perfect Sunday Afternoon..

What's a perfect Sunday Afternoon for you? For me it's all about the weather. Spring is here. Although we had a few cold days, the sun seems to come out on the weekends, which is when it really counts.

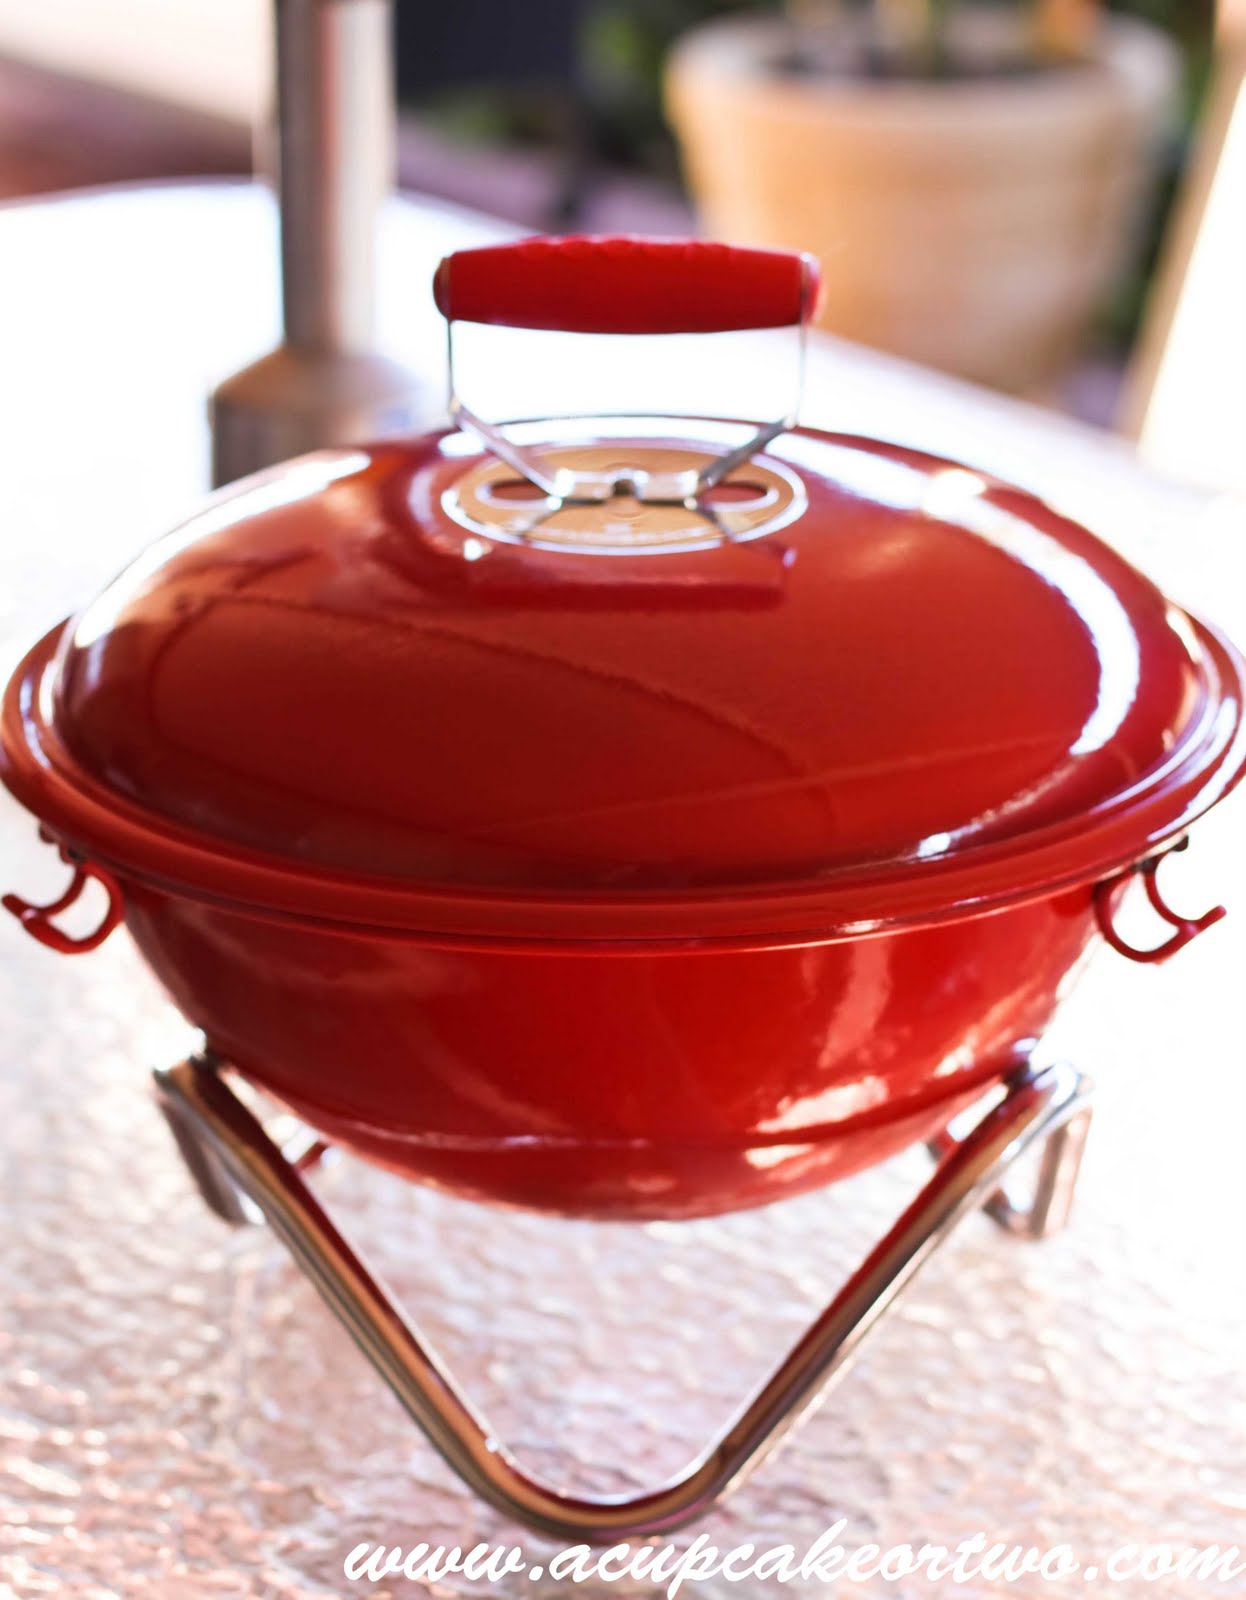
This weekend was the perfect time to give my new Bodum Picnic Grill a bit of a whirl. I have always wanted a picnic grill and this one is light, cute and comes in an amazing array of colours.


I made some Spiced Steak Kebabs and for dessert, BBQ Pineapple Chunks with Cinnamon Sugar.


Spiced Steak Kebabs (Martha Stewarts Everyday Living September Issue)

Ingredients

12 – 15 pieces sirloin steak chunks (cut into 1½ inches each)
½ cup extra virgin olive oil
2 teaspoons ground cumin
1 teaspoon ground coriander
1 medium green capsicum (cut into 1½ inch chunks)
1 medium red onion (cut into 1 inch pieces)
salt and pepper

Method

1. In a small bowl, combine the oil, cumin, coriander, salt and pepper together.

2. Thread the steak, onion and capsicum onto your skewers. I only used 4 chunks of steaks per skewer.

3. Brush the skewers with the oil mixture making sure that it is well coated. Set aside in the fridge for about 30 minutes.

4. BBQ the skewers, turning frequently to avoid burning. It’s best to take it off the heat when the meat is slightly pink. The skewers will continue to cook off the heat. Let it rest for 5 minutes before serving.


I first tasted these Pineapple Chunks at a Brazilian BBQ Restaurant. The sweet pineapple is perfect with the cinnamon sugar. Such a simple but delicious dessert.


BBQ Pineapple Chunks with Cinnamon Sugar

Ingredients

1 Pineapple (skin off and cut into thick chunks)
2 tablespoons cinnamon
4 tablespoons castor sugar
BBQ skewers (wooden skewers should be soaked in water to prevent burning)

Method

1. Mix the cinnamon and the sugar together and put it on a plate.

2. Coat each pineapple chunk in the cinnamon sugar mixture before putting onto the BBQ Skewers.

3. BBQ for 6 minutes each side. The outside should start to caramelise.

4. Let it cool slightly before serving.


You can add a little more cinnamon sugar after it has cooked. Don’t add too much as it will take away from the charcoal flavour. This is perfect served with coconut ice cream or fresh cream.

Thank you to Kitchenware Direct for sending me the Cool Bodum Picnic Grill to review. For more information on the Bodum range just go to Kitchenware Direct

Read more...
Related Posts with Thumbnails